

Check + Coverdash Workers' Compensation Integration Guide
Introduction
Coverdash is a digital insurance brokerage that helps small businesses find workers' compensation coverage from 30+ carriers, with instant quotes and pay-as-you-go premium options. Unlike traditional workers' comp policies where the premium is based on an estimated annual payroll, Coverdash offers pay-as-you-go insurance that systematically calculates premiums using actual payroll data every pay cycle.
How Pay-As-You-Go Premiums WorkWith pay-as-you-go workers' comp, premiums are calculated based on actual payroll data rather than annual estimates. After each pay run, Coverdash pulls payroll data from Check and adjusts the premium accordingly. This means employers pay for exactly the coverage they need — no large upfront deposits, and no surprise audits at year-end.
NCCI codes are required for each employee to enable accurate premium calculations. NCCI (National Council on Compensation Insurance) classification codes categorize employees by their job duties to determine risk and premium rates.
The Check + Coverdash Integration enables you to offer your customers workers' comp insurance directly in your platform, enabling you to:
- Quickly test for product-market-fit
- Differentiate your payroll product by adding an embedded insurance offering
- Add a new revenue stream for your business
Implementation Timeline ExpectationsIn order to integrate with Coverdash, Check requires additional information to properly stage you with Coverdash. Additionally, in order to launch the Coverdash component in production, you may need to sign a contract amendment.
This implementation process may take up to 2 weeks to complete.
If interested in integrating, please reach out to your Check representative to get this process started.
Integration Overview
Unlike other Check ecosystem integrations that use Check's /components/integrations endpoint, the Coverdash integration involves calling Coverdash's API directly. The integration follows a five-step process:
Step 1: Collect NCCI codes for employees
NCCI codes are required for each employee of the company to enable accurate premium calculations. NCCI (National Council on Compensation Insurance) classification codes categorize employees by their job duties to determine risk and premium rates.
To pass these to Coverdash, set the following field property on the employees of the company by using the Update an employee Check API endpoint.
{
  "metadata": {
    "ncciCode": "5183"
  }
}
You can expose a dropdown UI for companies to add their own NCCI codes using Coverdash's NCCI Lookup API, which takes industry as one of the parameters. A full list of NCCI codes can be found here.
Step 2: Create a Business in Coverdash
Call the Coverdash createBusiness API to register the employer in the Coverdash system. You should also pass the Check company ID (e.g. com_abc123...) to Coverdash in this call via the requestedBusinessId field in your API request. You'll receive a businessID to store on your end.
https://api.coverdash.com/partnerSubmission/createBusinessPass over as much information as you have about the employer at this stage (business name, address, industry, number of employees, etc.). The more data provided upfront, the fewer questions the Coverdash component needs to ask, and the faster the quoting experience will be. Instant quoting is available for all pay-as-you-go partners with sufficient data in the createBusiness call.
Refer to the Coverdash API documentation for the fullcreateBusinessrequest body and all available fields.
Step 3: Authorize Coverdash to access company data through Check
Grant Coverdash access to the your company's data through Check by using either the Authorize integration Component, or the Authorize an Integration Partner API endpoint.
Step 4: Create an Application in Coverdash
Using the businessID from Step 1, call the createApplication API with a policy type of workers' compensation. You'll receive an applicationID in return.
https://api.coverdash.com/partnerSubmission/createApplication
Refer to the Coverdash API documentation for the fullcreateApplicationrequest body and all available fields
Step 5: Surface the Coverdash Component
Using the applicationID from Step 2, render the Coverdash pay-as-you-go workers' comp component directly in your platform. The component is an embeddable piece of UI that you can embed via an iFrame.
AuthenticationAll Coverdash API requests require a Bearer token. Include the following header in your requests:
Authorization: Bearer YOUR_TOKENContact Coverdash for your API credentials.
Payroll Data AccessCoverdash must be enabled as a Check Ecosystem Partner for your account in order to pull the relevant payroll data on an ongoing basis for pay-as-you-go premium calculations. Your Check representative will coordinate this enablement as part of the implementation process.
Coverdash Experience Walkthrough
Getting a Workers' Compensation Quote
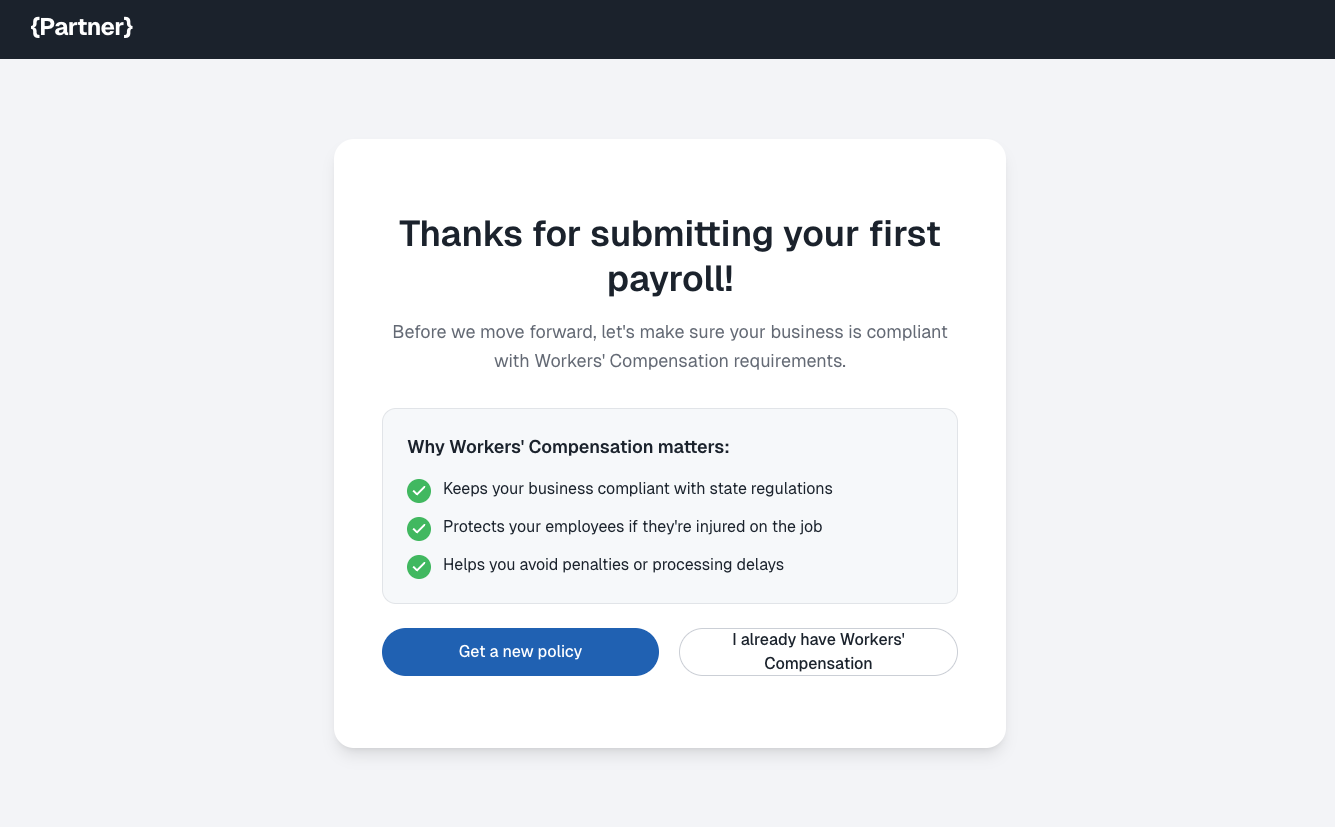
- After an employer submits their first payroll, surface the Coverdash component to prompt them to set up workers' compensation coverage. The component presents the value of workers' comp and gives the employer two options: "Get a new policy" or "I already have Workers' Compensation".
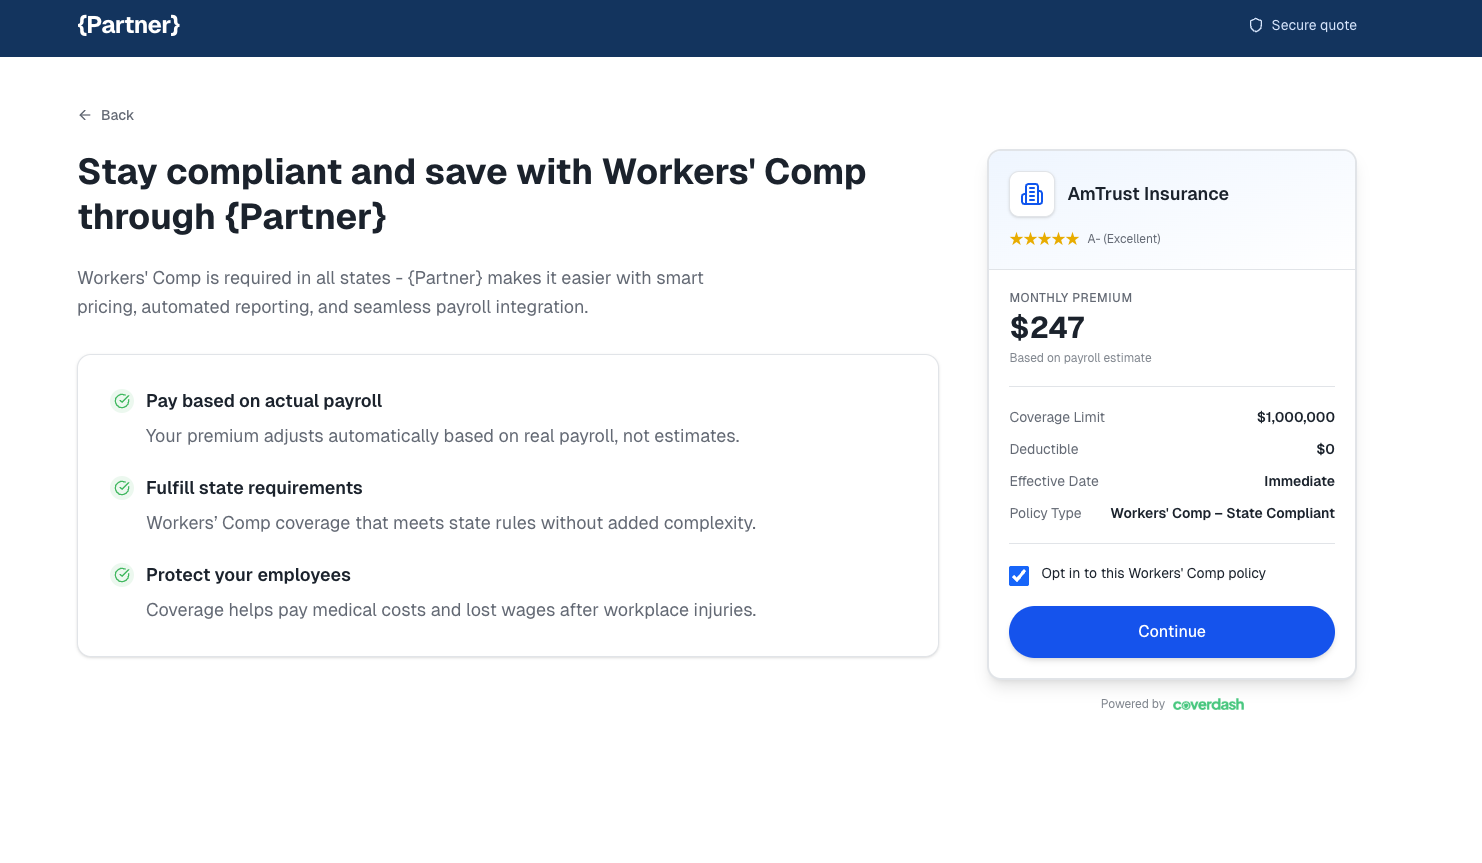
- New policy flow: Clicking "Get a new policy" takes the employer through the Coverdash quoting experience. The component collects any additional information needed and generates an instant quote from available carriers. The quote page displays carrier details, monthly premium (based on payroll estimate), coverage limit, deductible, effective date, and policy type.
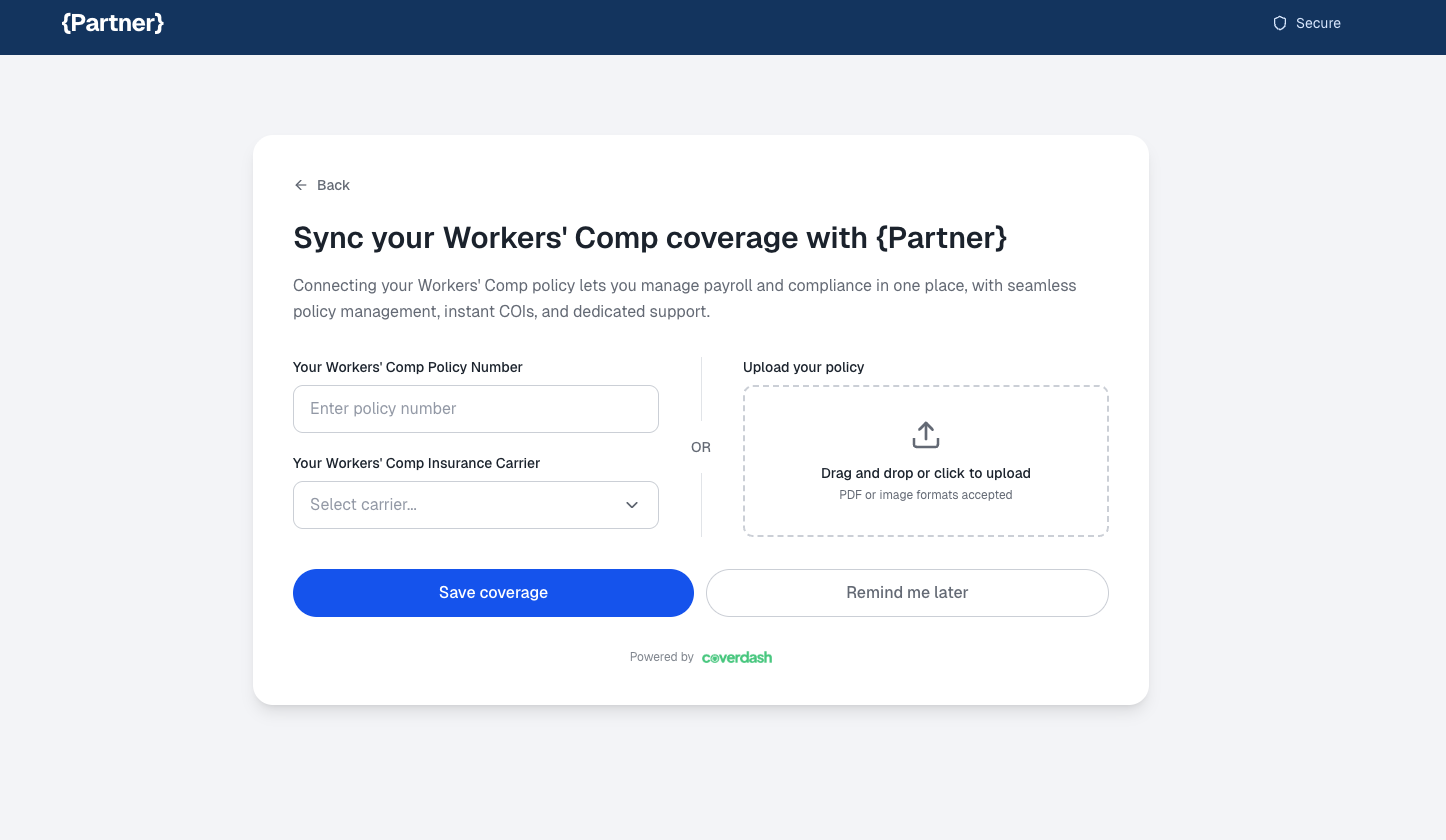
- Existing policy flow: Clicking "I already have Workers' Compensation" presents a form where employers can sync their existing coverage. They can enter their policy number and insurance carrier, or upload their policy document directly.
- After purchasing a new policy or syncing an existing one, the employer receives a confirmation email from Coverdash. They can manage their policy, view their Certificate of Insurance, and access dedicated support through the Coverdash dashboard.
Updated about 1 month ago