Receiving webhooks
Configuring your webhook endpoint
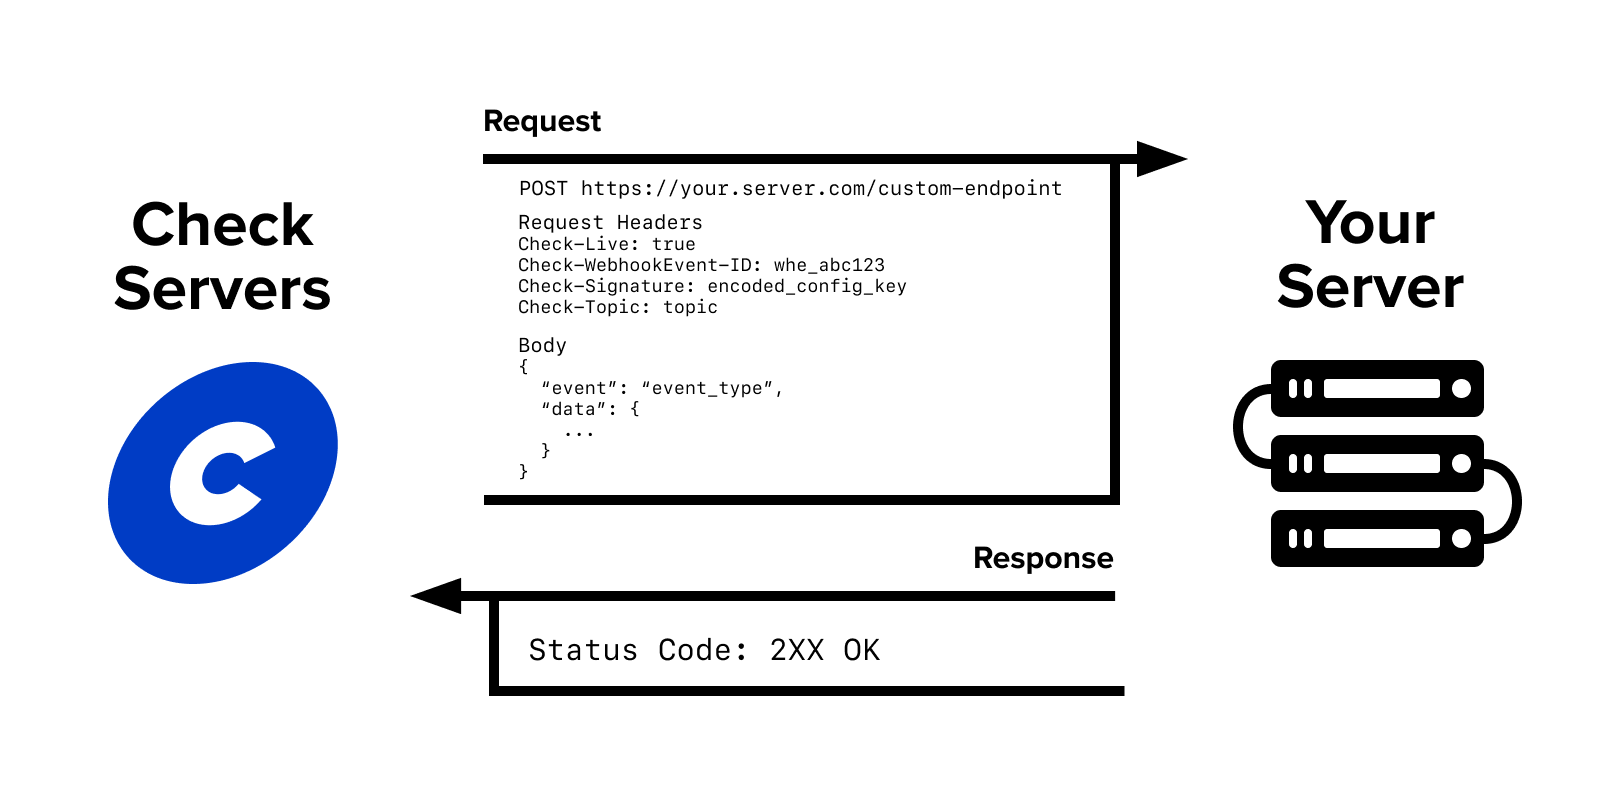
To consume webhooks from Check, you must first add a custom webhook endpoint to your server. At a minimum, this endpoint must be configured to accept POST requests and respond with a 2XX status within 5 seconds. If a 2XX is not received in time, Check will attempt to send the webhook again following the retry logic listed below. Beyond the status code, any information in the endpoint’s response will be ignored.
POST Request
To accommodate the webhook event data being sent in the body of the request, your endpoint must be configured to accept Check's webhook in the form of an HTTP POST request. The event data will be included as JSON in the body of the request.
Retry Logic
In the Live environment, Check will attempt to deliver your webhooks for up to four days with an exponential backoff. The retry period will start at 10 seconds, and max at 6 hours.
In the Sandbox environment, Check will only attempt to deliver your webhooks a total of 10 times with an exponential backoff. Failed webhooks can still be found in Console, and if there is a need to reconcile data after this period, you can always query for it directly.
Note that if your webhook endpoint repeatedly responds with non-2XX statuses for more than a few days, the configuration may be automatically deactivated by Check to preserve system stability. Webhook configs that have been deactivated can be reactivated via the API.
Recommended Practices
While the event data is included in the body of the request, we always recommend querying our API for the most recent version of the object you're receiving an event for. We also recommend returning 200 or 2XX response codes from your webhook endpoint, even for webhook events that you are choosing to ignore. This will indicate to Check that you are successfully receiving our webhooks, and will prevent us from re-attempting delivery.
Check’s Webhooks
The following fields are headers that are present on all Check webhook requests:
Check-Live:trueif the request is coming from live,falseotherwise.Check-WebhookEvent-ID: A unique ID identifying the webhook request.Check-Signature: A hash of the request body with the specific webhook key.Check-Topic: A top-level attribute identifying which category the webhook belongs to.
Note: Corresponding X-... headers (such as X-Live) are also currently included in the request, but these will be deprecated in the future.
The request body of all webhook requests (other than the ping) will have the following structure:
event: Identifies the event that happened to trigger this webhook.data: The serialized output of the object that changed. On any versioned objects, the serialized object will follow the default API version set on your account.
{
    "event": "event_type",
    "data": {
        // serialized object
    }
}
Authentication
Each webhook request from Check contains a Check-Signature header which can be used to verify the authenticity of the request. The signature, which is base-16 encoded, can be recreated by applying HMAC-SHA-256 to the body of the webhook request with the Webhook Config's key. See this example for how to implement SHA256 to verify webhook signatures (note: in this example the signature is base-64 encoded, whereas Check's signature is base-16 encoded).
IP Address Verification
If you wish to limit the IP addresses from which you accept webhook network traffic, you can limit inbound requests from the following IP addresses:
['44.195.7.1', '3.228.118.62', '52.0.144.131']Webhook Idempotency
It is possible, though rare, that you may receive a webhook request that you’ve already successfully processed. For example, if your endpoint takes longer than 5 seconds to respond, we consider the request failed, even if you end up returning a 2xx response code. To guard against processing the same webhook request twice, we include a Check-WebhookEvent-ID header in our webhook requests. We suggest you store the IDs of processed webhooks so you can ignore ones you have already seen.
Live vs. Sandbox
Webhook Configs created in the sandbox environment will receive requests about events that originate in the sandbox environment. Similarly, Webhook Configs created in the live environment will receive requests about events in the live environment. Every webhook request also contains a Check-Live header, which will be true if the request is coming from the live environment, and false otherwise.
Creating a Webhook Configuration
To begin receiving webhooks, create a webhook configuration like so:
curl -X POST https://sandbox.checkhq.com/webhook_configs -d '{
    "url": "<YOUR URL>"
}'
This request will create a webhook config object which you can inspect by issuing a GET request to /webhook_configs:
{
   "next": null,
   "previous": null,
   "results": [
       {
           "id": "whc_KsfGVBkOJnF3S3OmYVLJ",
           "url": "https://testing.com/check_webhook",
           "key": "4f541ff5350323b6ba6ca4e96873e6f4cb9fd144"
       }
}
Testing it Out
Now that you’ve set up a Webhook Config, you can send a ping request to your endpoint by making a POST request to the /ping endpoint, including the ID of the webhook config created by the request made above.
curl --request POST \
  --url https://sandbox.checkhq.com/webhook_configs/your_webhook_config/ping \
  --header 'Authorization: Bearer YOUR_API_KEY'
Your API should receive a request with a body that looks like the following:
{
   "message": "Test webhook"
}
Webhook Deactivation
In order to guard against resource contention in our production and sandbox environments, Check automatically deactivates Webhook Configs in production that have processed at least one webhook request, but have not returned a single 2XX response over a period of 7 days. In the sandbox environment, we disable Webhook Configs after 24 hours if no 2XX responses are received.
If a Webhook Config has been disabled that you want to re-enable, you can do so using the Update a webhook config endpoint.
Updated about 23 hours ago
